You can create any color by turning three knobs to mix different amounts of red, green, and blue light from a single LED.
The project uses an Arduino to read signals from three knobs (potentiometers). Each knob controls the brightness of one color in the RGB LED. When you turn a knob, it changes how bright that color shines. By adjusting all three knobs, you can create thousands of different colors.
Parts List
- Arduino Uno
- RGB LED (common cathode type)
- 3 knobs (10kΩ potentiometers)
- 4 resistors (220Ω)
- Breadboard
- Some jumper wires
- USB cable
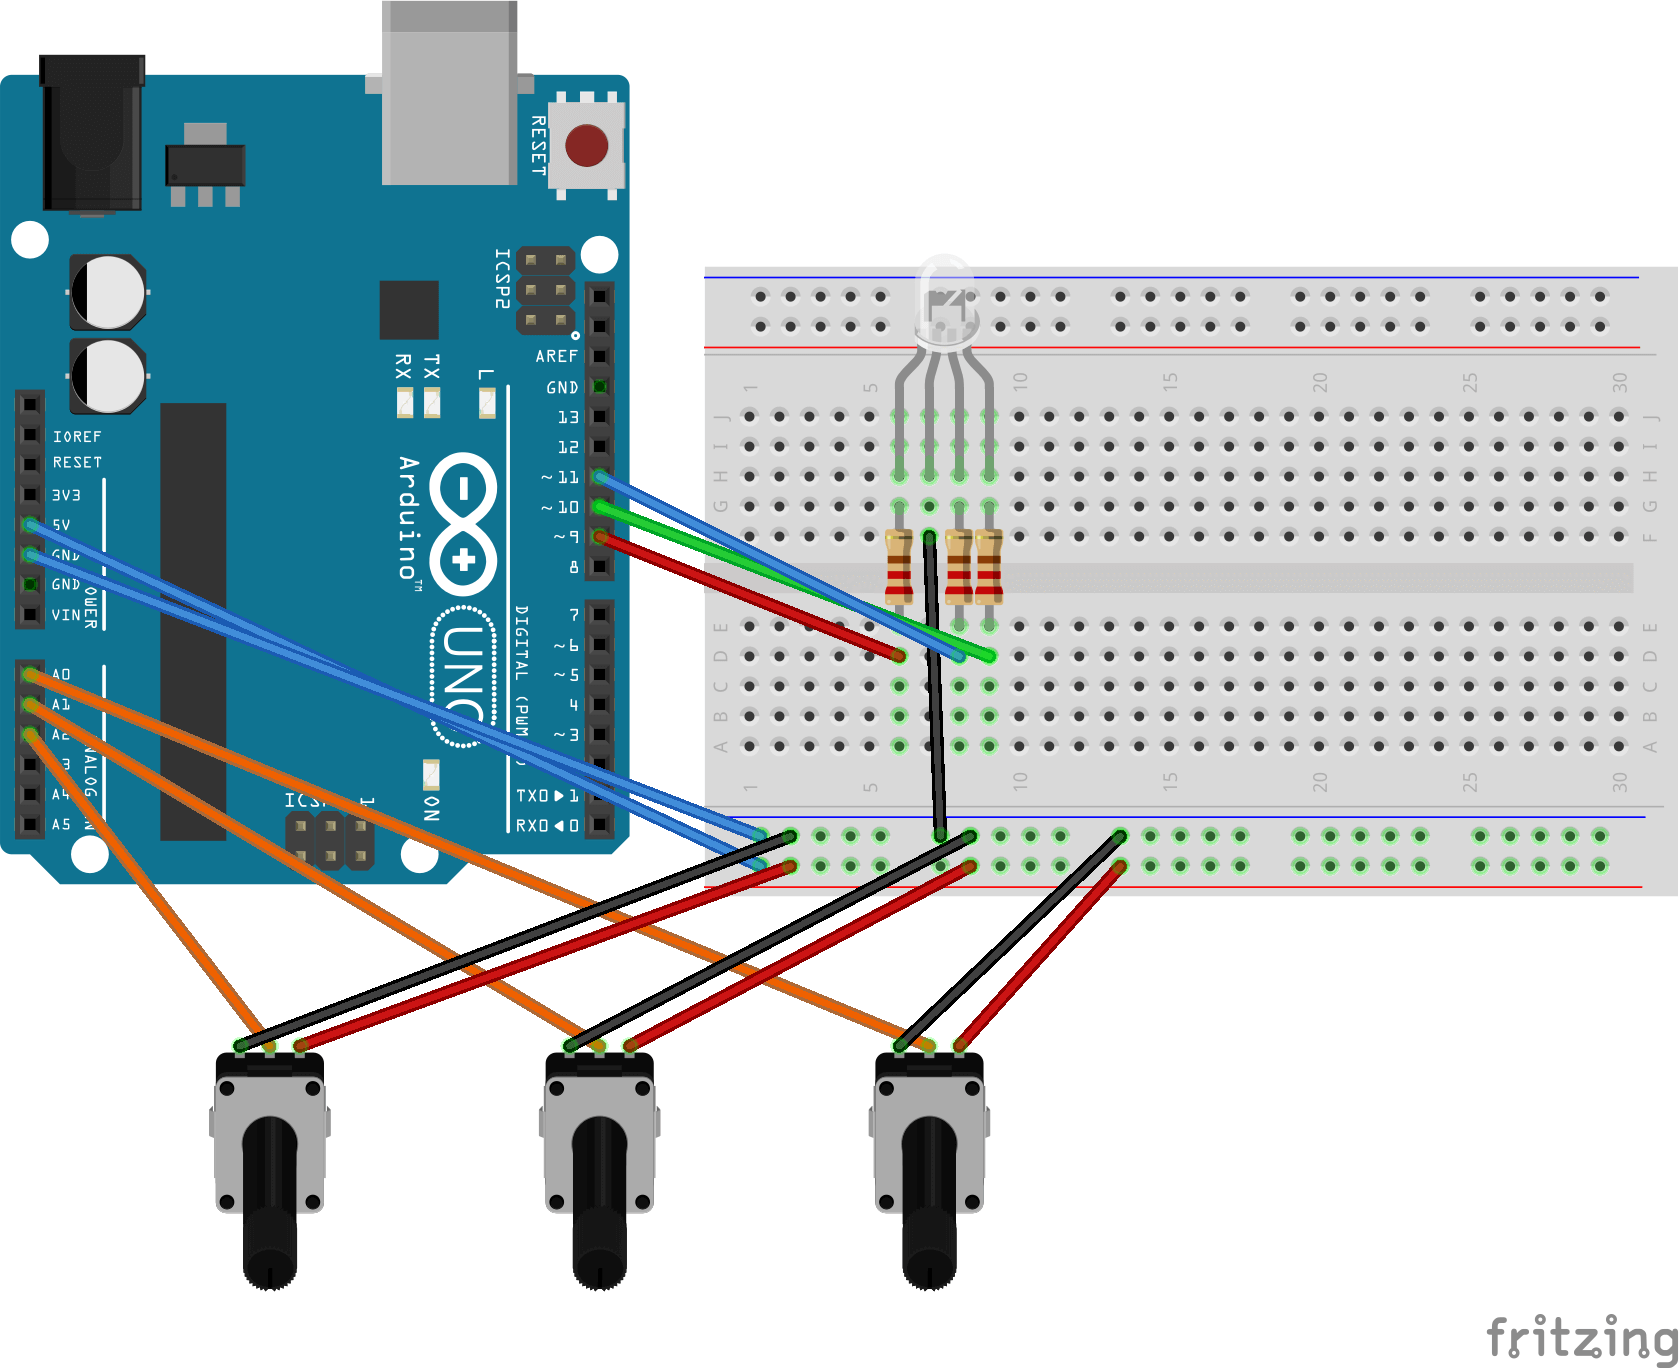
Wiring Diagram

Assembly Instructions
- Push the RGB LED into the breadboard. The longest pin should face down – this connects to ground
- Connect a 220Ω resistor to each colored pin of the LED (red, green, blue)
- Wire the red LED pin (through its resistor) to Arduino pin 9
- Wire the green LED pin (through its resistor) to Arduino pin 10
- Wire the blue LED pin (through its resistor) to Arduino pin 11
- Connect the long LED pin through a resistor to any Arduino ground pin
- Place your three knobs on the breadboard
- For each knob:
- Connect the left pin to Arduino ground
- Connect the right pin to Arduino 5V
- Connect the middle pin to A0 (first knob), A1 (second knob), or A2 (third knob)
