Ticking Clock
Get started with an annoying invention guaranteed to tick off most people! Hide it in a room without a clock and watch the confusion as people search for where the sound is coming from.
Parts list
What you’ll need



Step 1
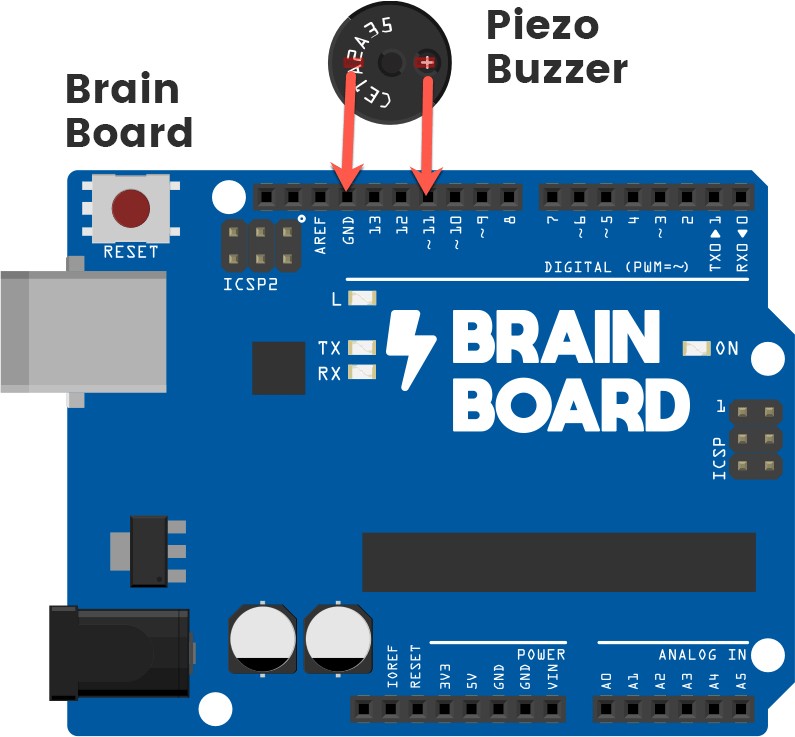
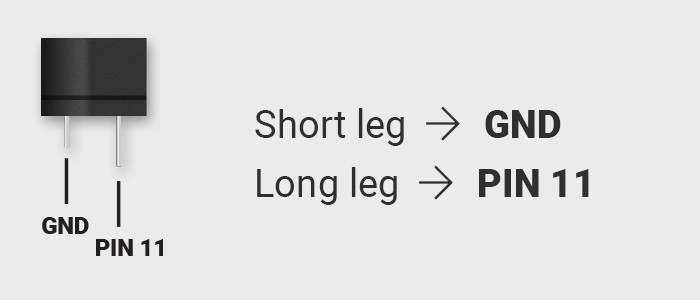
Let’s build this
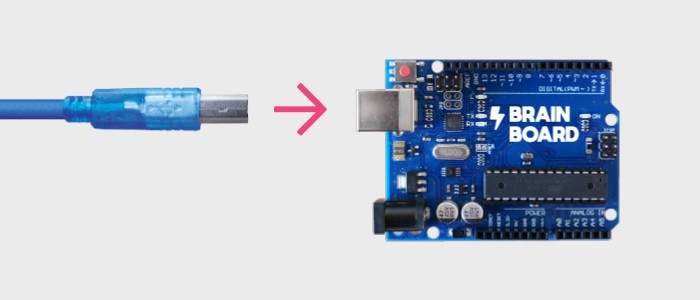

Step 2
Set up your computer
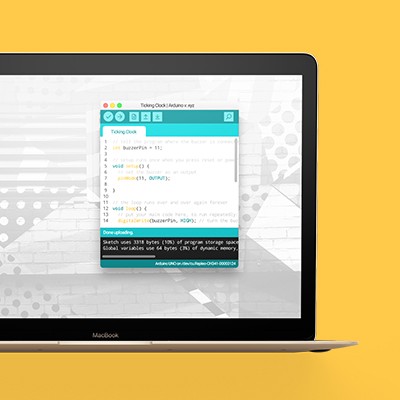
Find and open the ‘Arduino’ application
You should have already downloaded and installed this earlier. The app is used to send computer ‘code’, or instructions, to the Brain Board for each invention.
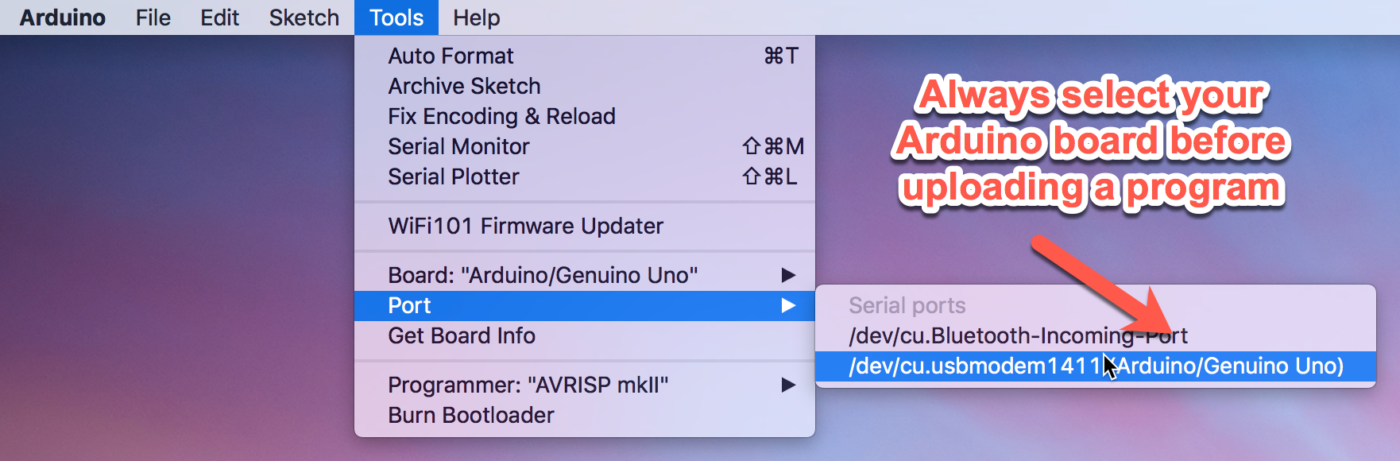
Select your board
Open the ‘Tools’ menu and select the option that says ‘Arduino/Genuino Uno’.
Step 3
Code some chaos
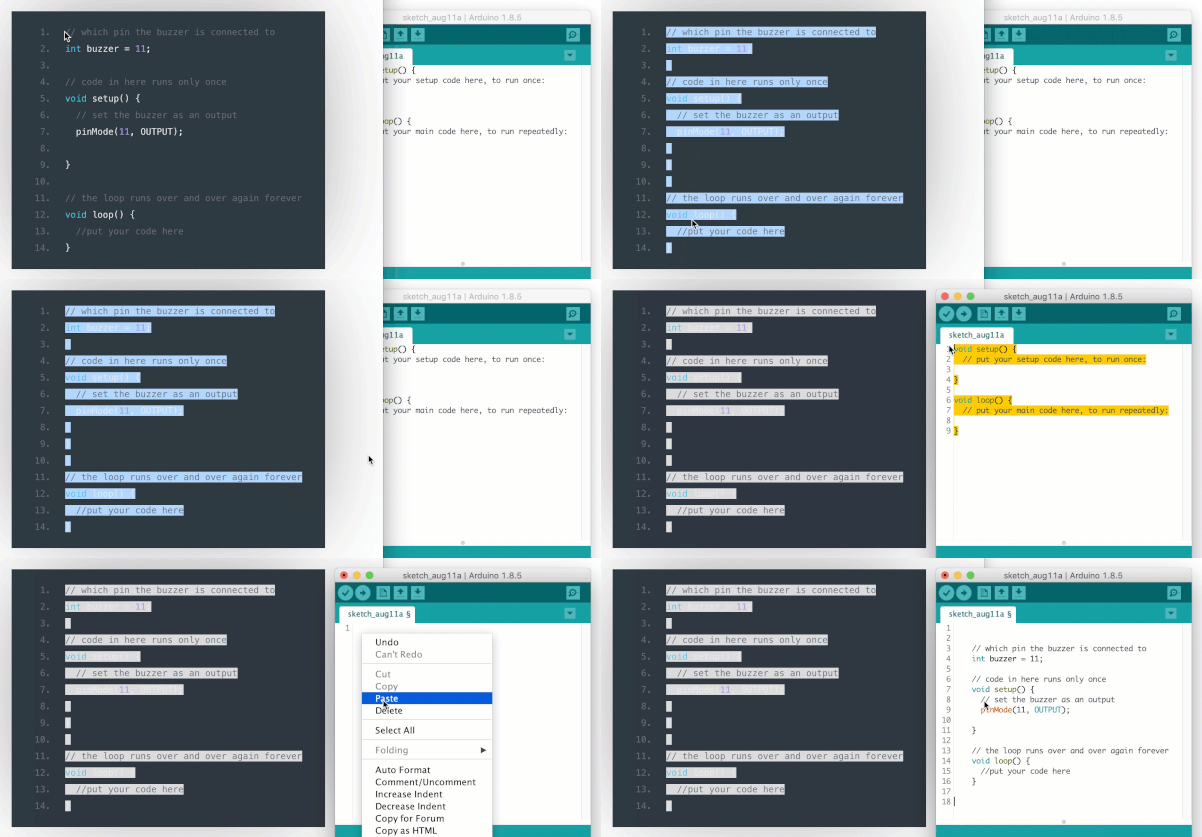
Copy and paste the sample code
The box to below contains some sample code. Use your cursor to select everything in this box, right click, and select ‘Copy’. Switch to the coding application and delete any text already there. Right click and select ‘Paste’ to insert the sample code.
void setup() {
  pinMode(11, OUTPUT);
}

void loop() {
  digitalWrite(11, HIGH);
  delay(1);
  digitalWrite(11, LOW);
  delay(1000);
}
Upload to the Brain Board
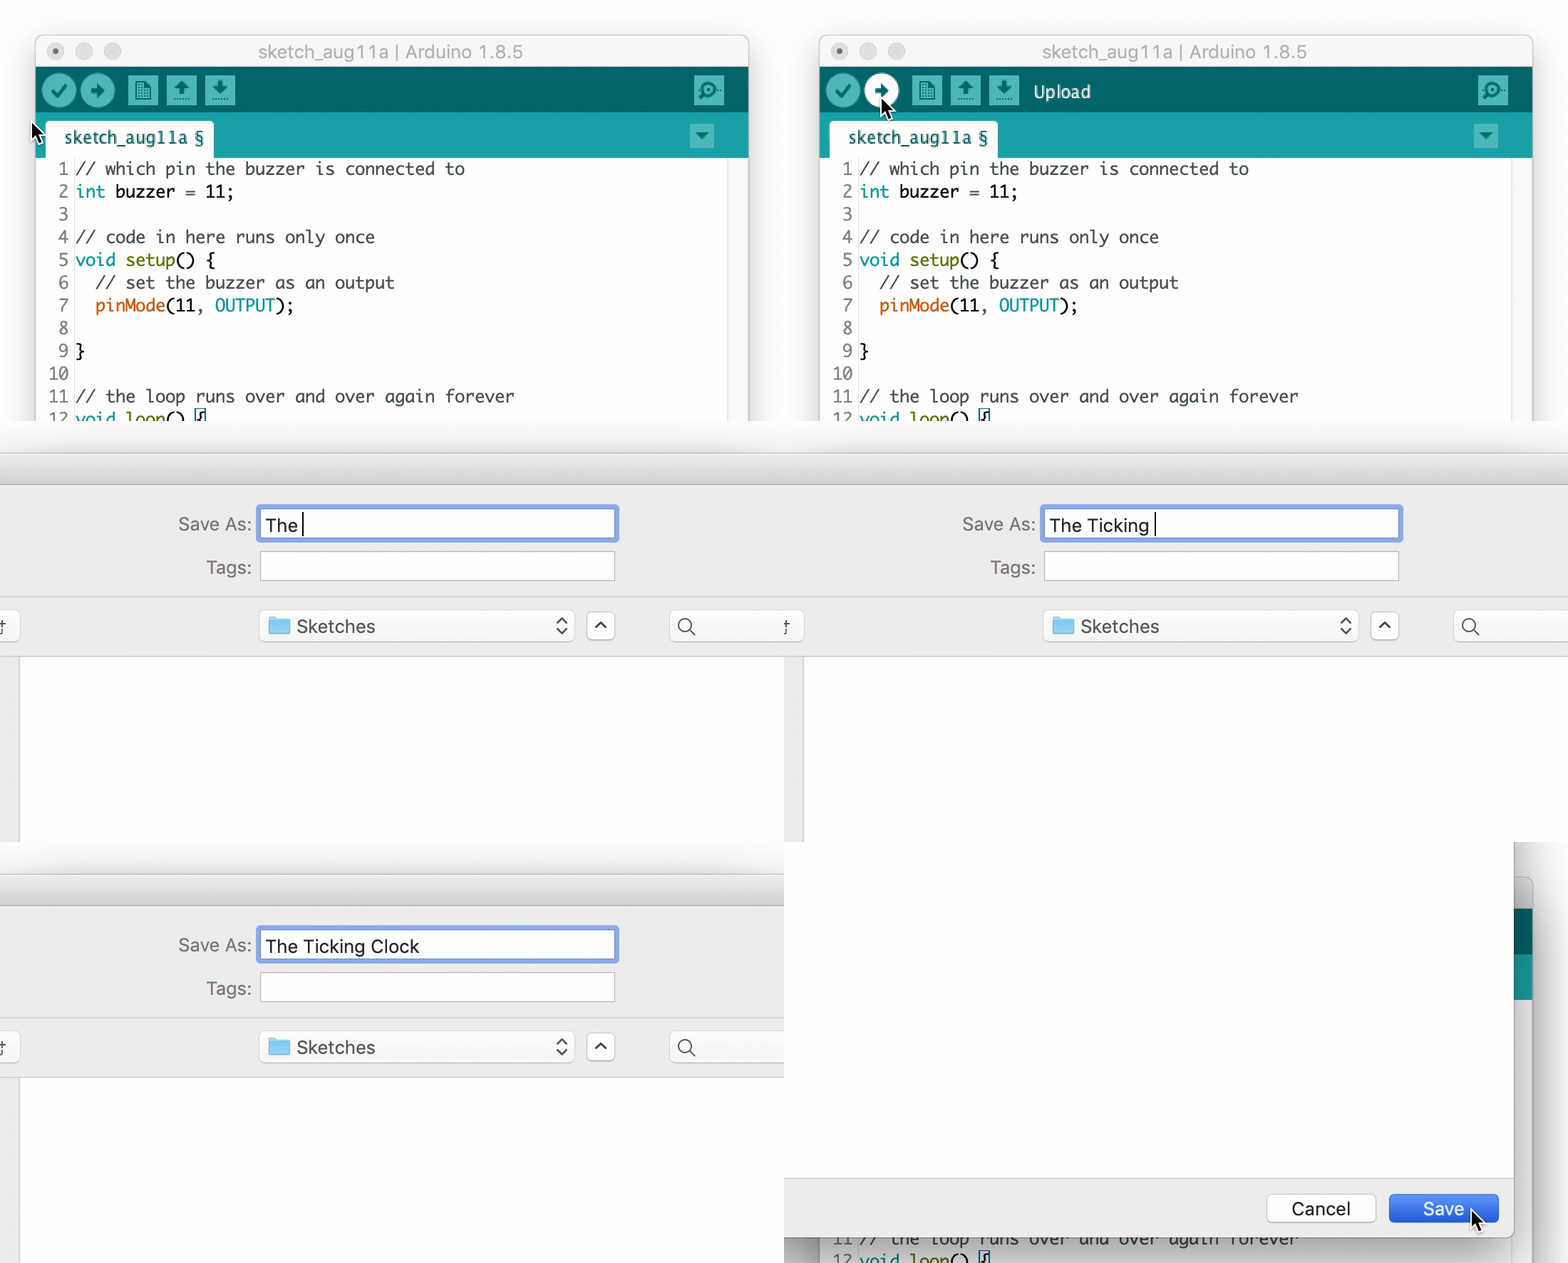
Wow! That was quick. You’re ready to test out your code. Click the upload button to send it to the Brain Board. The button is near the top of the window and has an arrow pointing to the right. You should now hear a ticking noise.
How does this all work?
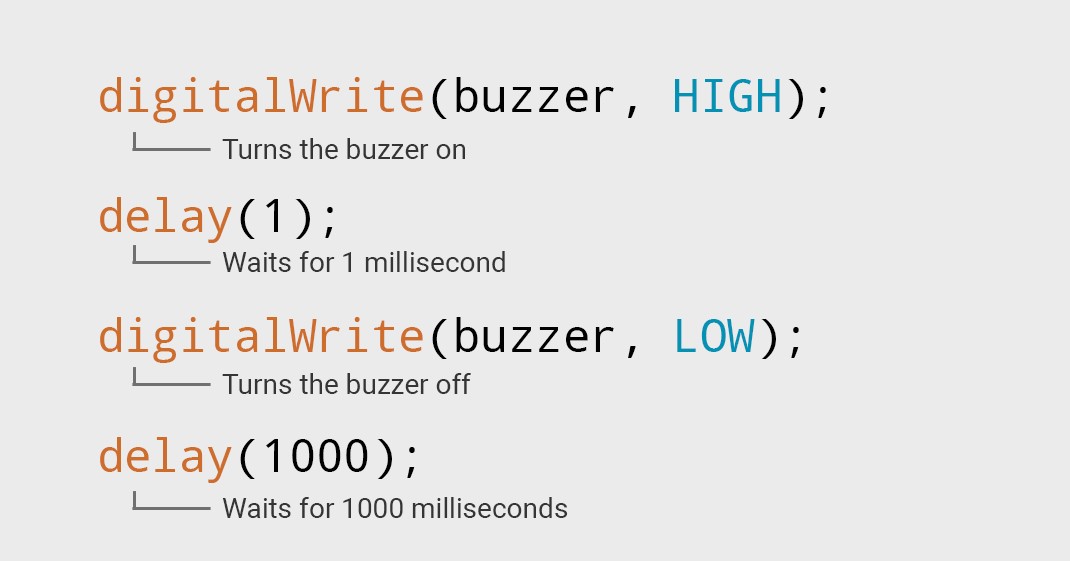
DigitalWrite is used to turn things on or off, like a buzzer or a light. A delay pauses the program for a certain number of milliseconds. Because the instructions are read from top to bottom, this means that the code turns the buzzer on for 1 millisecond (a thousandth of a second) to make a short ‘tick’ sound, before turning off again for a second.
Did you know…
1000 milliseconds = 1 second. In computer coding, we often use milliseconds rather than seconds when talking about time.